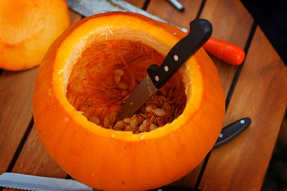
Truly a fun and enjoyable tradition for both children and adults, what's a Halloween celebration without a pumpkin carving? Check out these awesome tips and tricks for choosing the right tools and keeping your carved pumpkin fresh.
First, it's important to choose the right pumpkin. Select one that is fresh, with a stiff stem, no bruises, and a flat bottom so it won't roll.
Cut the lid out on an angle, not straight up and down. This keeps the lid from dropping inside the pumpkin when you replace it. A boning knife works suitably for this.
Remember to scoop out all the pulp - and then some. You can purchase a special "claw" for this, but an ice cream scoop will also work. Thin the inner wall of the "face" area to 1 1/4-inch thick, so it will be not difficult to pierce the shell.

Place the pumpkin in your lap when it's time to carve the features. As you can see, it's not difficult to carve when the face is glaring up at you. Never cut on a slant. Note that clean up-and-down slices appear result in perfect designs.
Use your scraps creatively. For example, you can make a tongue out of a discarded piece of pumpkin shell.
Make sure to keep your pumpkin fresh. Don't forget to spread petroleum jelly on the cut edges to seal in moisture. If your pumpkin still dries up a few days later, you can revitalize it with a facedown drench in cold water for up to eight hours.
If you like to leave the lid on while the candle is lit, make a chimney. To do this, leave the lid on for a few minutes while the candle burns, then create a small hole where the lid has blackened.
Finally, don't forget to spray a little cinnamon inside the lid. When you light the candle, your jack-o'-lantern will smell like pumpkin pie. YUM!
Send us your pictures. We would love to post them on Facebook!!
Happy Halloween! Have fun and be safe!!
|
